Marbled Madeleines Recipe

Marbled Madeleines Recipe

star

Marbled Madeleines Questions

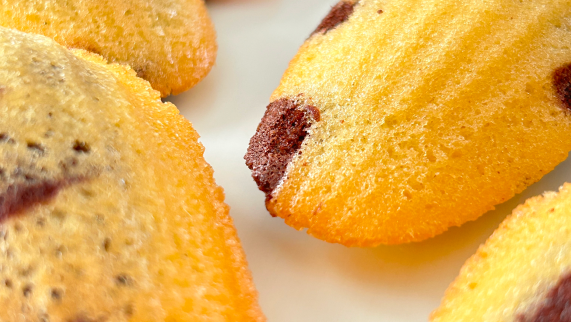
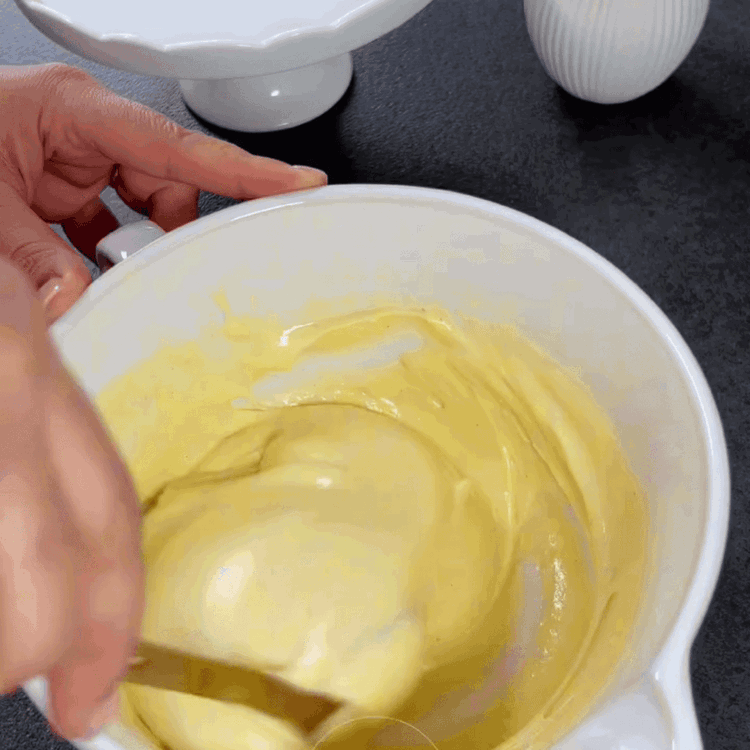
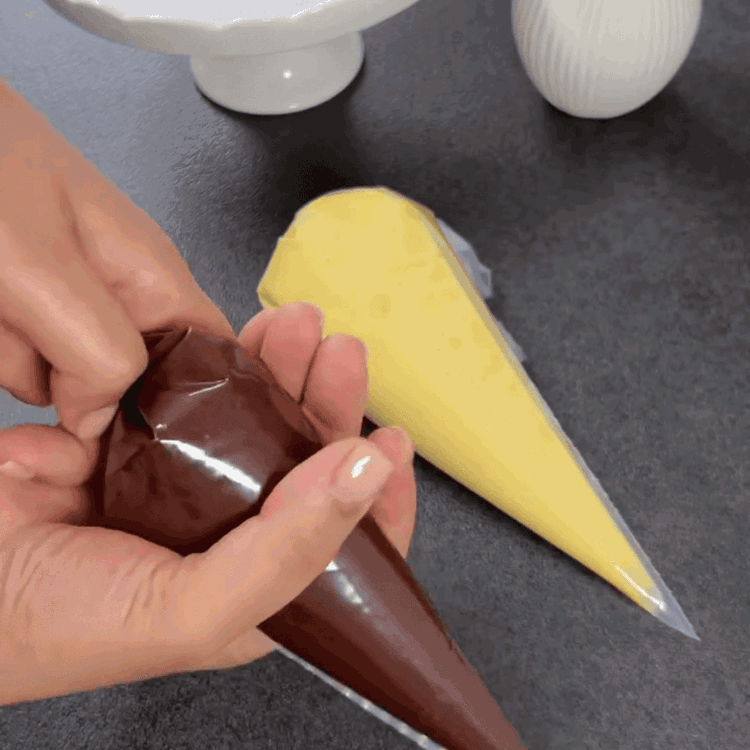
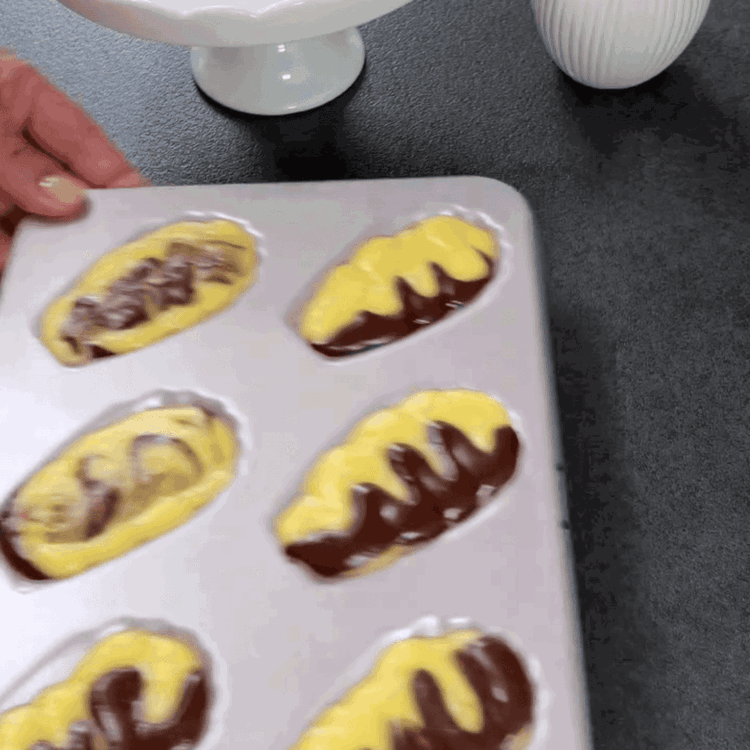
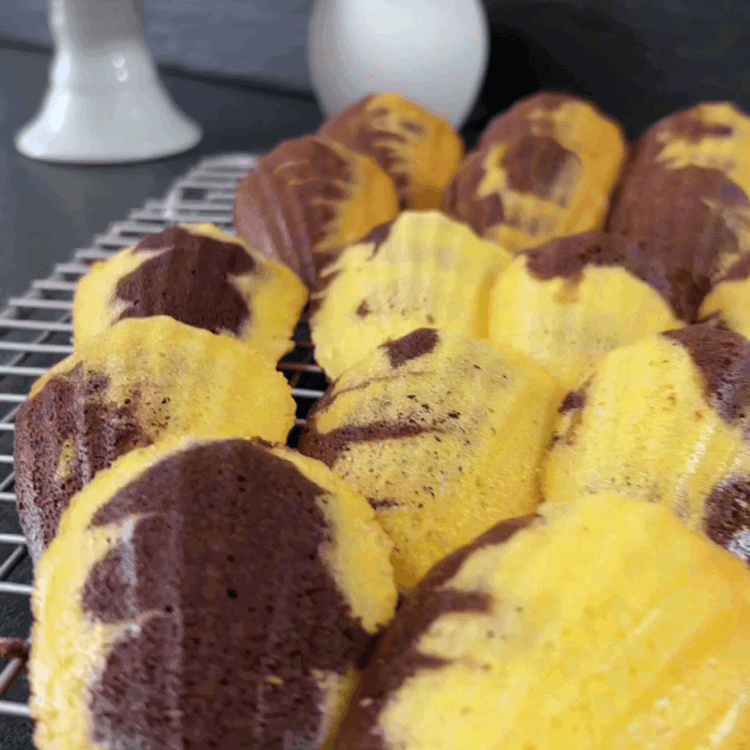
Marbled madeleines are a delightful twist on the classic madeleine, introducing a visually appealing and flavorful combination of vanilla and cocoa. While traditional madeleines feature a single flavored batter, marbled madeleines incorporate two separate batters, which are swirled together to create an eye-catching design. This not only enhances the aesthetic appeal but also offers a unique tasting experience by allowing you to enjoy the rich, chocolatey notes of cocoa alongside the light, airy sweetness of vanilla. The marbling technique elevates the overall presentation, making these madeleines perfect for special occasions, gatherings, or simply as an indulgent treat to brighten up your day.

Achieving the perfect texture for marbled madeleines requires attention to detail during the mixing and baking process. Firstly, it’s crucial to beat the eggs and sugar until they reach a light and airy consistency, which helps the madeleines rise beautifully during baking. When incorporating the dry ingredients, sifting the flour and baking powder into the mixture prevents lumps and ensures an even distribution. Folding in the melted butter gently is essential to maintain the batter’s airy quality. Additionally, avoid overmixing, as it can lead to denser madeleines. Baking them in a preheated oven at 190 degrees Celsius for a precise 10-12 minutes will yield feather-light, golden brown pastries that are soft on the inside and slightly crisp on the outside.

Absolutely! One of the joys of baking marbled madeleines is the versatility in flavoring. While the basic recipe calls for vanilla and cocoa, you can easily experiment with other flavors to suit your palate. For instance, you might consider adding citrus zest—like lemon or orange—to the vanilla batter for a refreshing twist. Alternatively, you could infuse the cocoa batter with spices such as cinnamon or espresso powder to enhance the chocolate flavor. If you prefer nutty notes, try incorporating finely ground nuts like almonds or hazelnuts into one of the batters. Customizing flavors not only personalizes your madeleines but also allows you to create unique variations that can surprise and delight your friends and family.

To achieve that iconic shell shape and lovely ridges characteristic of traditional madeleines, it's essential to prepare your madeleine molds properly. Greasing the molds with melted butter or lining them with butter ensures that the batters release easily once baked. Additionally, filling the molds with the batter should be done thoughtfully; avoid overfilling to prevent them from overflowing during baking. Use a piping bag for a neat and controlled distribution of the batters, allowing for an even marbling effect. Furthermore, chilling the batter for a brief period before baking can help improve the rise, resulting in more pronounced shapes. Lastly, once they are baked, allow them to cool for just a few minutes before transferring them to a rack; this prevents them from becoming soggy.

To maintain the freshness and flavor of your marbled madeleines, it’s best to store them in an airtight container at room temperature. This will preserve their delicate texture while keeping them from drying out or becoming stale. For optimal taste, consuming them within a few days is recommended, as madeleines are best enjoyed fresh. If you find yourself with excess madeleines, they can also be frozen without compromising their flavor. Simply place them in a freezer-safe bag or container, ensuring there’s minimal air to prevent freezer burn. When you’re ready to enjoy them, allow the madeleines to thaw at room temperature—this ensures they retain their lightness and flavor. With these storage tips, you can indulge in your homemade marbled madeleines for days to come!