Chocolate Buns Recipe

Chocolate Buns Recipe

star

Chocolate Buns Questions

These chocolate buns are distinct due to their soft, fluffy texture complemented by a rich chocolate filling, making them an indulgent treat suitable for any time of day. Unlike traditional chocolate bread, which can be denser, this recipe focuses on creating a light and airy dough by incorporating active dry yeast, resulting in a delightful rise and a soft crumb. The combination of melted butter and vanilla in the filling not only enhances the chocolate flavor but also adds a warm, comforting aroma. Additionally, the use of sliced almonds for topping adds a crunchy texture that contrasts beautifully with the tender buns. This recipe embodies the perfect balance of sweetness and richness, making it a beloved choice for dessert or an afternoon snack.

Absolutely! One of the best features of these chocolate buns is their versatility. While the original recipe suggests chocolate chips mixed with butter and vanilla extract, you can easily experiment with various fillings. Consider using different types of chocolate, such as dark, milk, or white chocolate, to tailor the sweetness level to your preference. Additionally, you might incorporate other flavor enhancers like a dash of cinnamon or nutmeg for warmth. Nut lovers can substitute chocolate chips with chopped nuts like hazelnuts or walnuts for added crunch and depth. For a fruity twist, try adding dried fruits like cherries or cranberries alongside the chocolate. These variations can give you a new exciting flavor experience every time you bake them!

Preparing and baking these chocolate buns typically takes around 2 to 2.5 hours. After mixing the ingredients, the dough needs to rise for about 1 hour until it has doubled in size. This fermentation time is crucial for developing the texture and flavor of the buns. Once the dough is ready and has been shaped and filled, the baking process takes approximately 15 to 20 minutes in a preheated oven at 180°C. After baking, allowing the buns to cool completely before dusting with powdered sugar enhances their presentation and flavors. Overall, while you do need patience during the rising phase, the actual hands-on time is relatively short, making them a worthwhile endeavor for a delicious homemade delicacy.

To ensure optimal results with your chocolate buns, start by using quality ingredients. Make sure your active dry yeast is fresh and properly activated with lukewarm milk to achieve the best rise. Kneading the dough adequately is essential; aim for a smooth and elastic texture, which contributes to the fluffiness of the buns. Don’t hesitate to let the dough rise in a warm place, as a warm environment significantly aids in the fermentation process. When rolling and cutting your dough, aim for even pieces to ensure consistent baking. Finally, keeping an eye on the baking process is crucial; every oven is different, so check for that perfect golden brown color. Taking these precautions will lead to a batch of chocolate buns that are irresistibly soft and delicious.

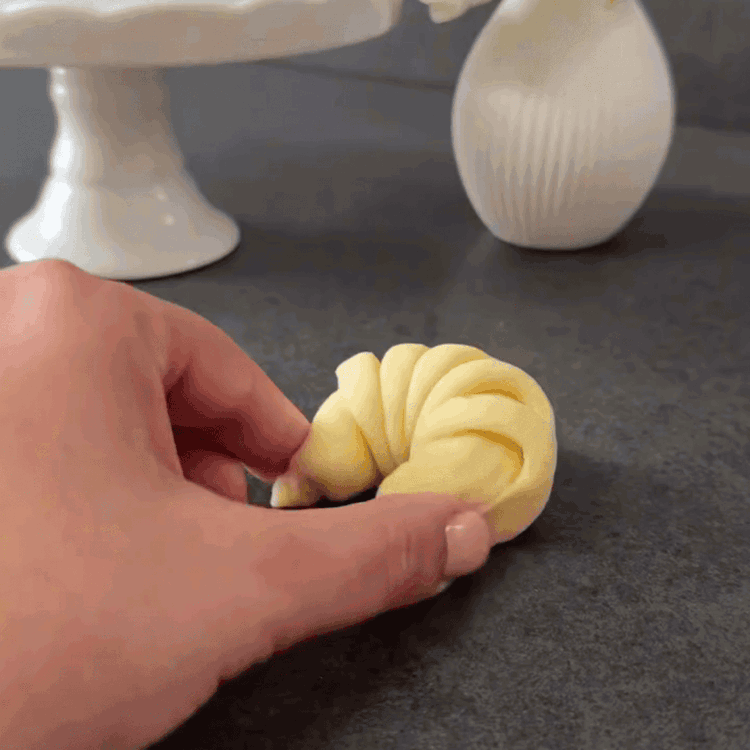
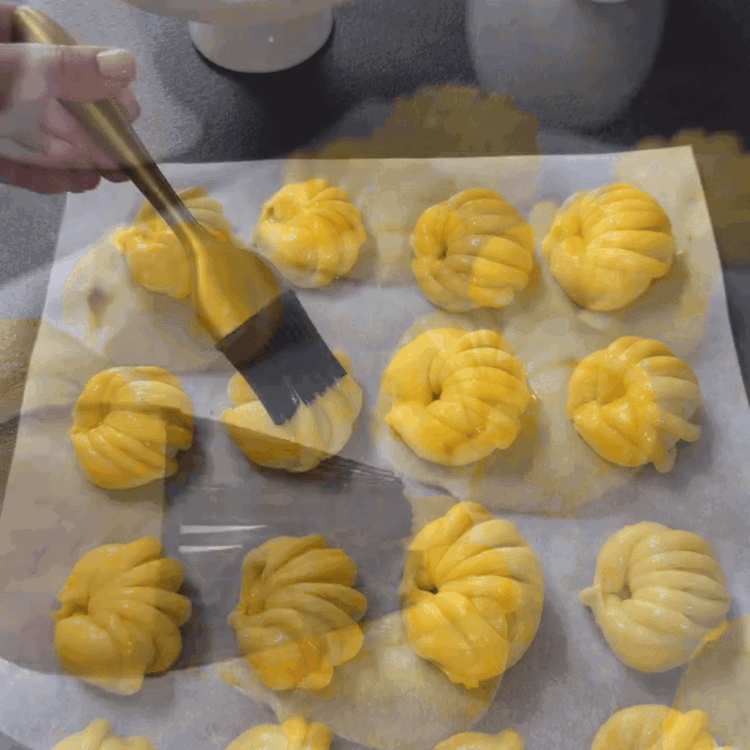
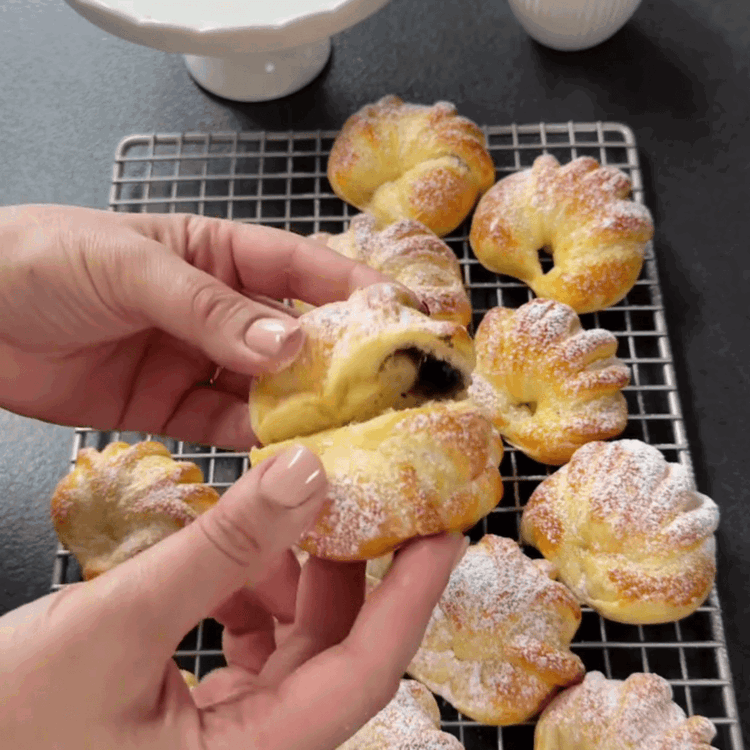
If you have any leftover chocolate buns (though it's hard to resist them!), store them in an airtight container to maintain their softness. At room temperature, these buns will typically stay fresh for about 2 to 3 days. If you'd like them to last longer, consider refrigerating them, but be aware this may slightly change their texture, making them firmer. For optimal freshness, you can also freeze the buns. To do this, wrap each bun tightly in plastic wrap, followed by a layer of aluminum foil, ensuring no air can compromise their texture. Frozen buns can last for up to 3 months. When ready to enjoy, simply thaw them at room temperature or warm them briefly in the oven to restore their delightful softness.